Travel Trailer Inspection Checklist: A Step-By-Step Guide
A missed leak in the roof, a hidden frame crack, or a failing electrical system, any one of these can turn a great deal on a used travel trailer into a money pit. Whether you're buying your first rig or inspecting one you've owned for years before hitting the road, a thorough travel trailer inspection checklist keeps you from overlooking the stuff that matters most. Skipping even a single check can mean costly repairs down the line or, worse, a safety issue miles from home.
The problem is that most people don't know exactly what to look for or where to start. Travel trailers have dozens of systems and components working together, plumbing, electrical, structural, mechanical, and each one has its own failure points. A structured, step-by-step approach makes the process manageable instead of overwhelming, even if you're not a certified technician. And when you do find something beyond your skill level, having a qualified mobile RV technician come to you beats hauling your trailer to a shop.
That's exactly what we built MobileRVService.com to help with. Our directory connects RV owners with over 3,200 mobile technicians and inspectors across North America who can perform on-site pre-purchase inspections, maintenance checks, and repairs. This guide walks you through a complete inspection process step by step, so you'll know what to look for yourself and when it's time to call in a pro.
What to bring and how to set up the inspection
Before you touch a single latch or panel, getting the right gear together and approaching the inspection in the right order will save you time and catch problems you'd otherwise miss. A sloppy, unprepared inspection leads to gaps. Showing up ready means you work through your entire travel trailer inspection checklist without backtracking or missing a section because you forgot a flashlight.
Tools and supplies to bring
You don't need a shop's worth of equipment, but a few targeted tools make the difference between spotting a serious issue and walking right past it. Bring everything on this list before you head out, and keep it in a bag or small tote so nothing gets left behind.
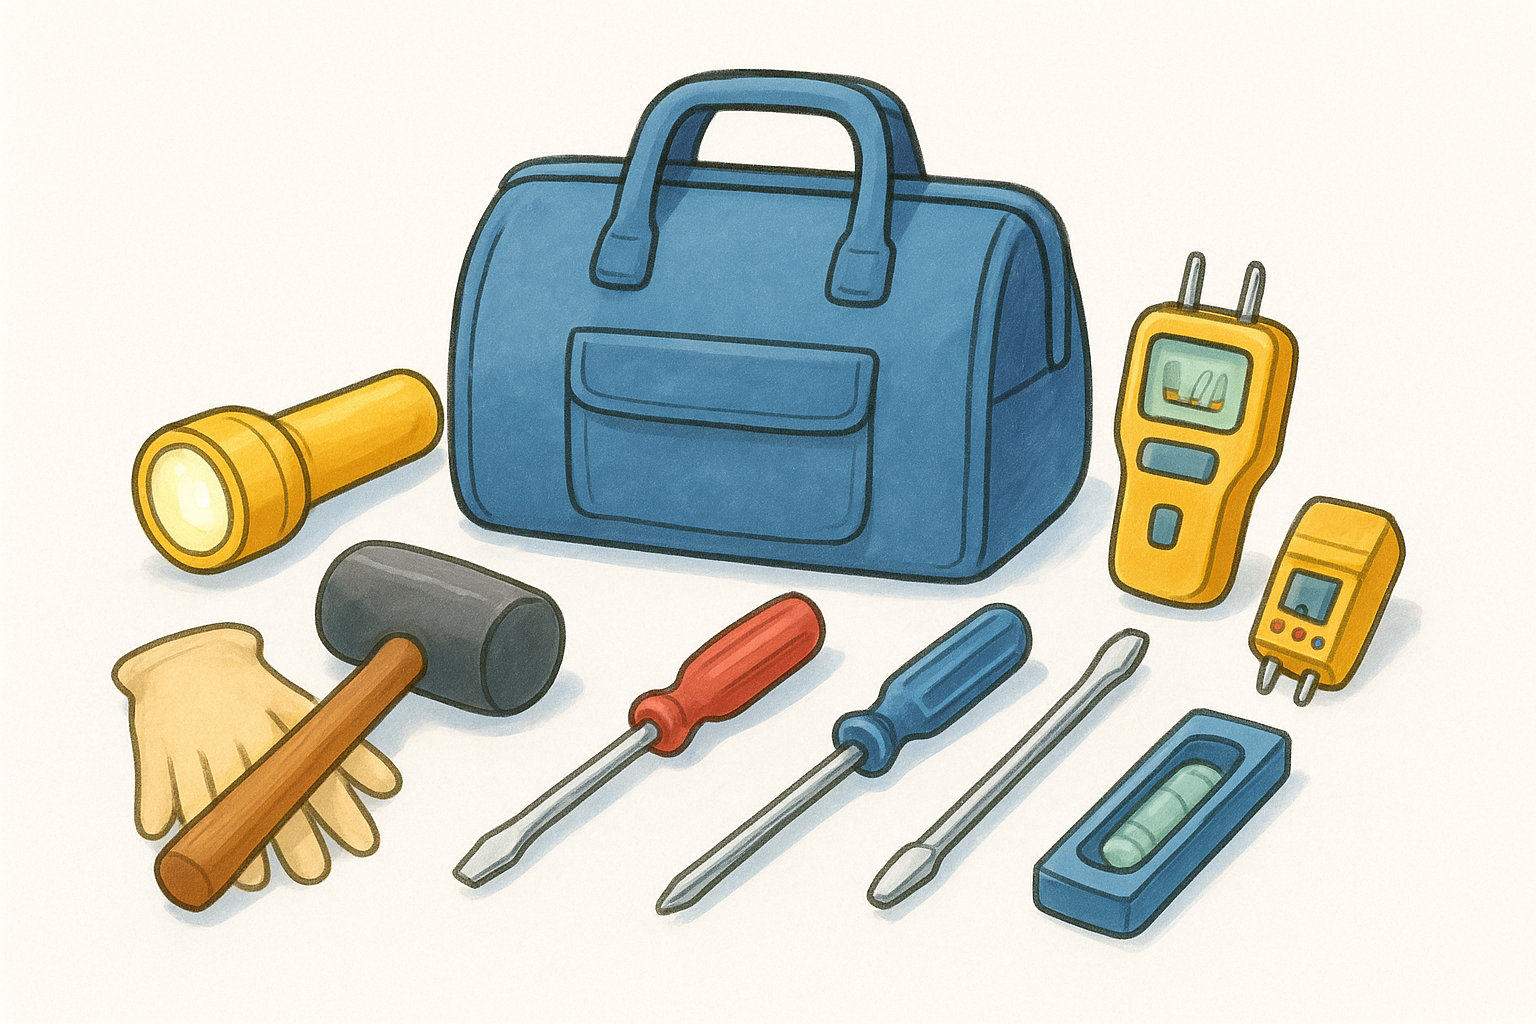
Here's what to pack:
- Flashlight or headlamp - you'll use this inside cabinets, under the trailer, and in any dark corner
- Rubber mallet - tap along the floor to check for soft spots from water damage
- Moisture meter - measures moisture content in walls, floors, and ceiling panels; readings above 17% are a warning sign
- Flathead and Phillips screwdrivers - for removing access panels and testing latches
- Electrical outlet tester - plugs into interior outlets and tells you instantly if wiring is correct
- Small torpedo level - checks if the trailer sits level, which affects slide-out and door alignment
- Ladder - most travel trailer roofs require a 6-foot or taller stepladder to reach safely
- Latex gloves - useful when checking under the trailer or inside tank bays
- Notepad or your phone - document everything you find with notes and photos
A moisture meter is one of the most valuable tools you can bring. Water damage is the single biggest hidden cost in used travel trailers, and it rarely looks serious from the outside until it's already structural.
How to set up the inspection
Pick a time of day when there's enough natural light to see the roof and exterior clearly. Overcast mornings work well because you avoid harsh glare from direct sun, which can mask surface damage in reflections. If you're doing a pre-purchase inspection, ask the seller to have the trailer unhooked from any tow vehicle and parked on a flat surface so you can work around all four sides without obstacles.
Walk the full exterior once before you start your detailed checklist. This first pass gives you an overall picture of the trailer's condition and flags anything obviously wrong. Look for major dents, damaged trim, or sagging sections that might shift your inspection priorities. Then start at the front of the trailer and work clockwise so you cover the same ground systematically every time.
Finally, turn on the water pump, propane, and shore power (or a generator) before you begin the interior portion. These systems need a few minutes to pressurize and stabilize, so getting them running early means they're ready to test by the time you reach those sections. Working in a logical sequence like this keeps the full inspection moving efficiently without repeated setup steps.
Step 1. Verify paperwork and safety basics
Before you start physically inspecting the trailer, verify the paperwork and test the basic safety systems. These checks take less than ten minutes but protect you from buying a trailer with a title problem, expired registration, or non-functioning smoke and carbon monoxide detectors. Starting here keeps the rest of your travel trailer inspection checklist grounded in fact rather than assumption.
Documents to review before anything else
Ask the seller to provide every document they have before you open a single compartment. The title should match the seller's ID and show no liens; if there's a lienholder listed, confirm it's been paid off in writing before any money changes hands. The VIN on the title must also match the VIN plate, which is usually stamped on the front frame rail or A-frame tongue of the trailer.
Here's what to collect and verify:
- Title - confirm ownership, check for liens, and verify the VIN matches the plate on the trailer
- Registration - confirm it's current and the state matches the seller's account
- Warranty documents - note any transferable coverage that still applies to components
- Service and repair records - a paper trail tells you how well the trailer has been maintained
- Owner's manual - useful for system specs and appliance serial numbers
A title with a salvage or rebuilt brand is a serious red flag. It typically means the trailer was previously declared a total loss, which affects both its structural integrity and resale value.
Safety systems to test
Carbon monoxide and smoke detectors are the first things to test inside any trailer. Press the test button on each unit; a working detector beeps immediately. Most detectors have a manufacture date printed on the back, and the NFPA recommends replacing smoke alarms every 10 years and CO detectors every 5 to 7 years.
Check the LP gas detector as well, which sits low near the floor since propane is heavier than air. Turn on the propane at the tank, then press the detector's test button to confirm it responds. Also locate the fire extinguisher and verify the pressure gauge needle reads in the green zone with the safety pin intact.
Step 2. Inspect the exterior and roof
The exterior tells you more about a travel trailer's history than almost anything else on your travel trailer inspection checklist. Water intrusion starts at the outside and works its way inward, so catching damaged seals, cracks, or soft panels early means you're stopping rot and mold before they spread. Work systematically from front to back along each sidewall before you climb to the roof.
Walls, seams, and seals
Every seam, joint, and caulk line on the sidewalls is a potential entry point for water. Run your hand along each horizontal and vertical seam and press lightly on the sidewall panels as you go. Soft or spongy panels indicate moisture has already gotten in and begun breaking down the substrate underneath, which is an expensive fix.
Look specifically at these areas:
- Corner caps - front and rear; check for cracks, lifting edges, or gaps in the sealant
- Windows and vents - run your finger around the frame edge and press on the surrounding wall panel
- Slide-out seals - inspect the rubber wiper seals on all four sides of any slide; torn or compressed seals let in water and road debris
- Entry door frame - push on the wall directly above and beside the door; this area flexes during travel and loses its seal first
Discoloration, bubbling paint, or a soft wall panel near any opening almost always means active or past water intrusion, even if no leak is visible right now.
Roof inspection
The roof is the most critical area of the entire exterior inspection, and it's the one most buyers skip. Get up there with your ladder and walk slowly, pressing down with your foot every few steps to check for soft spots in the decking beneath.
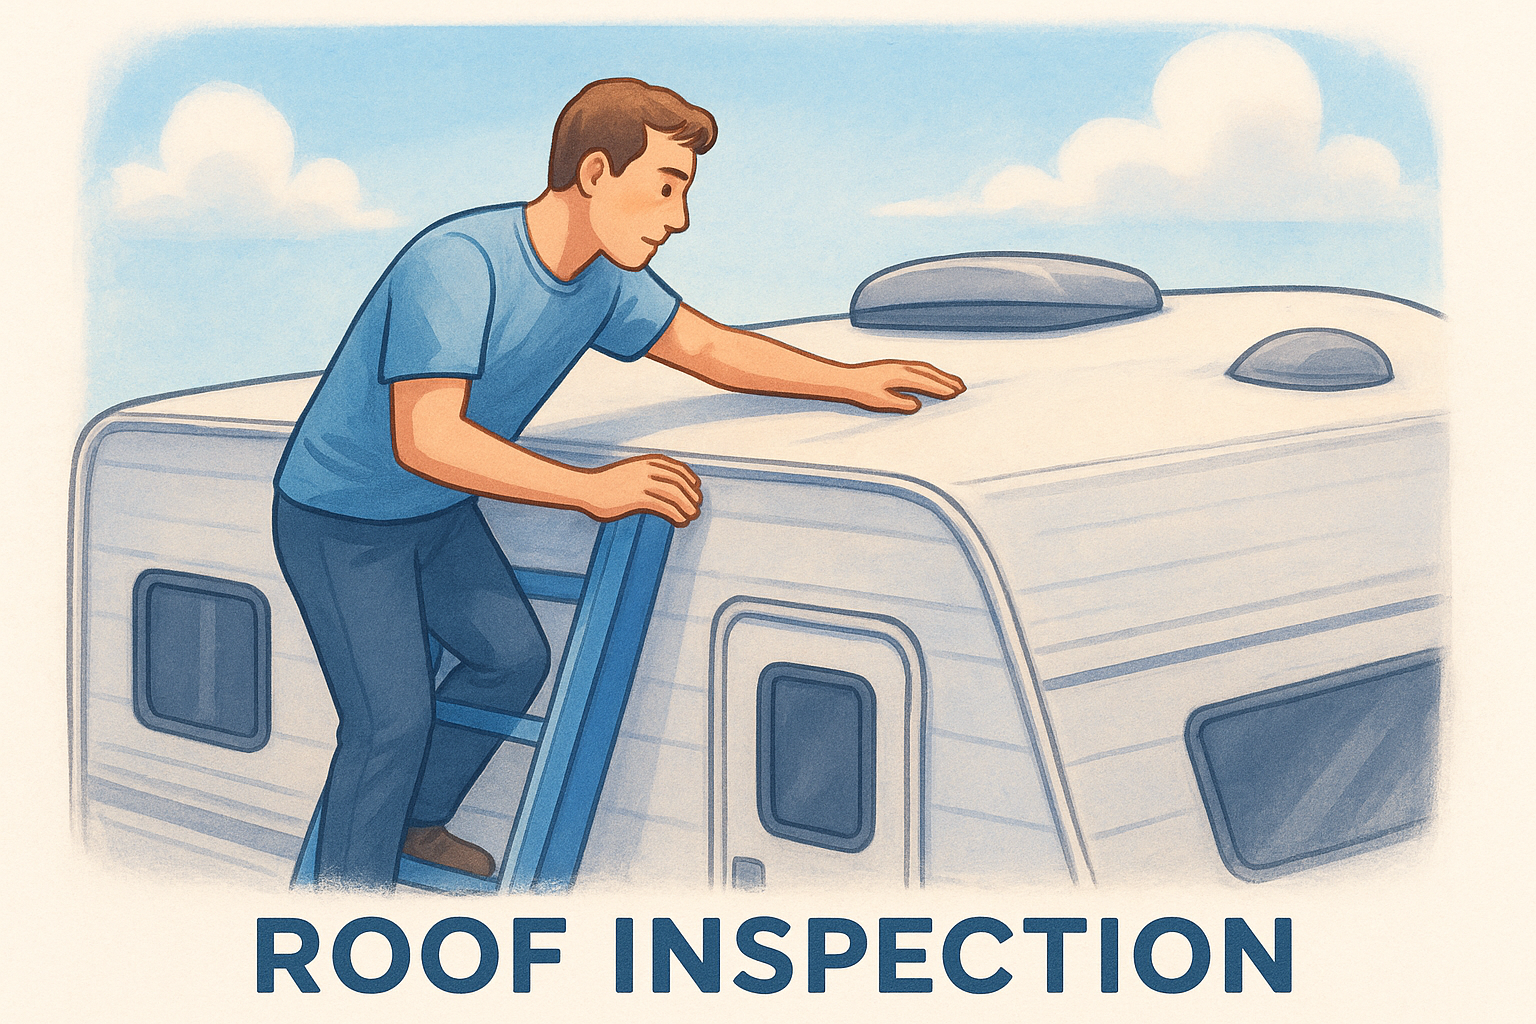
Inspect every sealant bead around vents, skylights, the air conditioner base, and antenna mounts. Sealant that is cracked, pulling away, or missing entirely needs to be resealed before the trailer gets used again. Run your moisture meter along the interior ceiling panels below each penetration point to confirm no water has already worked its way through.
Step 3. Check chassis, hitch, and running gear
The chassis, hitch, and running gear keep your trailer safely connected to the tow vehicle and rolling down the road. This section of your travel trailer inspection checklist covers components that fail quietly and often without visible warning until something goes wrong at highway speed. Inspecting these parts on a flat surface in good daylight gives you the clearest view of what's worn, cracked, or corroded.
Frame, coupler, and tongue
Get down on the ground and work your way along the full length of the frame rails from the front A-frame tongue to the rear bumper. Look for cracks, bends, or weld failures, especially near the tongue where stress concentrates during towing. Rust on the frame is common but surface rust is different from deep pitting or flaking that has compromised the steel's thickness.
Check these specific points on the hitch and tongue:
- Coupler ball socket - open the latch and look inside; the socket should be smooth with no cracks or oval-shaped wear from a mismatched ball size
- Safety chains - confirm both chains are present, the correct length, and free of broken links
- Tongue jack - crank it up and down to confirm smooth operation; inspect the foot pad for bending
- Weight distribution bars - if present, check the brackets and head assembly for cracks or missing hardware
- Breakaway switch cable - this safety device applies the trailer brakes if the trailer separates; verify the cable is intact and the battery in the breakaway box holds a charge
A worn or cracked coupler socket is one of the most commonly missed hitch problems. If the socket is oval instead of round, the ball can pop free under hard braking or during a sharp turn.
Wheels, tires, and brakes
Check every tire for tread depth, sidewall cracking, and bulges. Travel trailer tires age out faster than they wear out, so look for the DOT manufacture date molded into the sidewall; the last four digits tell you the week and year of production. Tires older than five years need replacement regardless of how the tread looks.
Spin each wheel by hand and listen for grinding, which points to a failing bearing. Pull the dust cap on each hub and look for grease that is brown, watery, or full of metal particles, all signs the bearings need repacking or replacement before your next trip.
Step 4. Test interior, appliances, and tanks
The interior portion of your travel trailer inspection checklist covers everything you actually live with on the road. By this point your water pump, propane, and shore power are already running, so you can move through each system quickly without stopping to set things up as you go. Work from front to back inside the trailer the same way you did on the exterior.
Floors, walls, and slide-outs
Start at the front of the interior and walk every square foot of the floor using your rubber mallet to tap as you go. A solid floor produces a sharp knock; a soft or hollow sound points to water damage underneath. Pay extra attention to areas directly below windows, vents, and the entry door, where leaks are most likely to have started.
Run your moisture meter along the lower 12 inches of every interior wall and around any slide-out opening. Readings above 17% mean moisture is present, even if you can't see staining or swelling yet. Extend any slide-outs fully and check that the floor transitions are flush, the seals sit tight on all four sides, and the slide retracts smoothly without binding.
Appliances and electrical
Test every appliance by switching it on and letting it run for at least two minutes. Turn the furnace on and confirm warm air comes from each vent. Run the air conditioner on both fan-only and cooling modes. Light each burner on the propane stove and verify a steady, blue flame with no yellow tips, which would indicate a blocked orifice. Check the refrigerator on both propane and 120V power; the interior should begin cooling within a few minutes on electric mode.
A refrigerator that cools on electric but not propane often has a faulty igniter or a blocked burner tube, both of which are straightforward repairs for a mobile technician.
Water system and tanks
Turn the water pump on and open each faucet one at a time. Pressure should build within a few seconds and hold steady. Listen for the pump cycling repeatedly with no faucet open, which signals a leak somewhere in the lines. Flush each toilet and confirm the foot pedal seal holds water in the bowl without draining. Check under every sink for soft cabinet floors, staining, or active drips before you close out this section.
Wrap Up and Find a Qualified Mobile Inspector
Running through a complete travel trailer inspection checklist takes a few hours, but it gives you a clear, documented picture of exactly what you're buying or what your rig needs before your next trip. Every system you checked, from the roof sealant and frame welds down to the water pump and appliance burners, is a potential repair bill you either caught early or ruled out entirely.
Some findings fall outside what you can assess yourself, and that's where a professional pre-purchase inspection makes the difference. A certified mobile RV inspector comes to the trailer's location, brings calibrated tools, and gives you an unbiased written report you can use to negotiate or walk away with confidence. If you need help locating a qualified technician in your area, find a mobile RV inspector near you through our network of over 3,200 vetted service providers across North America.